Question
I am getting ready to put the deck on the Freedom I am building.
I want a good clean glue line and no white showing from rounding the ply wood Is this possible are do
I need to just make the glass try to turn about a ninety degree over the sides of the hull.
Helppppppppppppppppp
Ron
putting on deck
-
tx river rat
- Posts: 989
- Joined: Wed Feb 21, 2007 10:48 pm
- Type of boat I like: <-- Please read instructions to the left and delete this text. Then, tell us what type boat you like! :-)
- Location: Tx
-
hairymick
- Design Reviewer
- Posts: 1965
- Joined: Wed Jan 04, 2006 8:54 am
- Type of boat I like: <-- Please read instructions to the left and delete this text. Then, tell us what type boat you like! :-)
- Location: Queensland, Australia
- Contact:
Hi Ron,
Will try tofind some piccies of what I do and try to explain as we go.
Basically, you need to install shear clamps along the tops of the top/side panel.
Don't panic mate. All is not yet lost.
Will try tofind some piccies of what I do and try to explain as we go.
Basically, you need to install shear clamps along the tops of the top/side panel.
Don't panic mate. All is not yet lost.
Regards,
Mick
JEMWATERCRAFT Swampgirl; Wadefish;Touring Pirogue;South Wind; P5 ;
Laker X 2, Sasquatch 16.5 T-V 15 Okwata 15:
Cobia 15 (under construction)
Mick
JEMWATERCRAFT Swampgirl; Wadefish;Touring Pirogue;South Wind; P5 ;
Laker X 2, Sasquatch 16.5 T-V 15 Okwata 15:
Cobia 15 (under construction)
-
hairymick
- Design Reviewer
- Posts: 1965
- Joined: Wed Jan 04, 2006 8:54 am
- Type of boat I like: <-- Please read instructions to the left and delete this text. Then, tell us what type boat you like! :-)
- Location: Queensland, Australia
- Contact:
Hi Ron
Here is about the only piccie I can find at the moment.
I don't have the IT skills to do up a drawing of what I mean.
Basically, all a shear clamp is, is a strip of wood that is glued along the inside of the top, side panel of your kayak. It provides a little stiffening to the hull and also provides a greater glueing surface for the deck to stick to.
Sort of like a small inside gunwhale.
For the height to set it to, it needs to be set so that the bottom corner of your deck panel meets up with the inside corner of your side panel. (much the same as stitching the side panels to the bottom panels.
Once this is set right, and you are satisfied that the deck will fit the hull, run a bead of epoxy along the top of the shear clamp to glue the deck to the sides and then do an exterior fillet along the outside of the seam.
When set up CAREFULLY sand a radius in the fillet and tape over.
Hope this helps a bit mate. I am sure Matt will chime in shortly with something.
Below is a piccie of the shear clamps I installed in my pirogue for the minidecks. A different set up but the principle is much the same.
Regards,
Mick
JEMWATERCRAFT Swampgirl; Wadefish;Touring Pirogue;South Wind; P5 ;
Laker X 2, Sasquatch 16.5 T-V 15 Okwata 15:
Cobia 15 (under construction)
Mick
JEMWATERCRAFT Swampgirl; Wadefish;Touring Pirogue;South Wind; P5 ;
Laker X 2, Sasquatch 16.5 T-V 15 Okwata 15:
Cobia 15 (under construction)
-
Oldsparkey
- Design Reviewer
- Posts: 1272
- Joined: Sat Jun 19, 2004 11:08 am
- Type of boat I like: Wood boats .
- Location: Somewhere around Central Florida
- Contact:
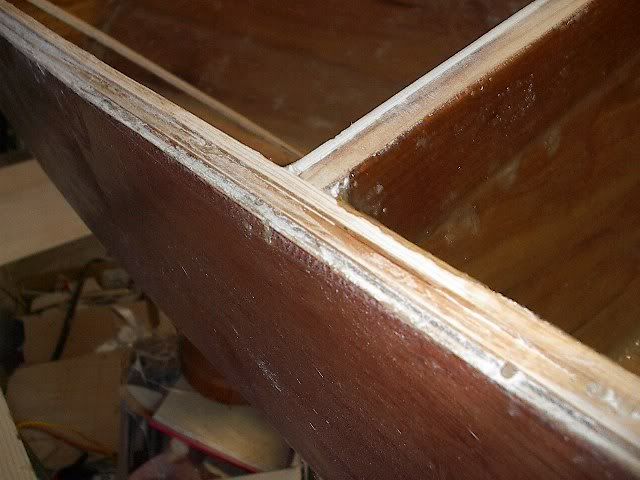
On the Freedom I made , what I did was to set a strip of wood (about 3/4 by 1/4 ) around the inside of the hull and had it about 1/8th of an inch from the top of the sides.
The reason for the 1/8th inch recess is because I made the boat from 1/8 th inch wood.
If you look closely at the picture you can see it running around to top.

This gave me a lip around the boat to drop the deck on , so everything was flush and then epoxy it in place. Running a bead of epoxy along the seam let the epoxy coat the edge of the deck , the inner part of the hull and even down onto the strip holding the deck in place.
This picture might help.

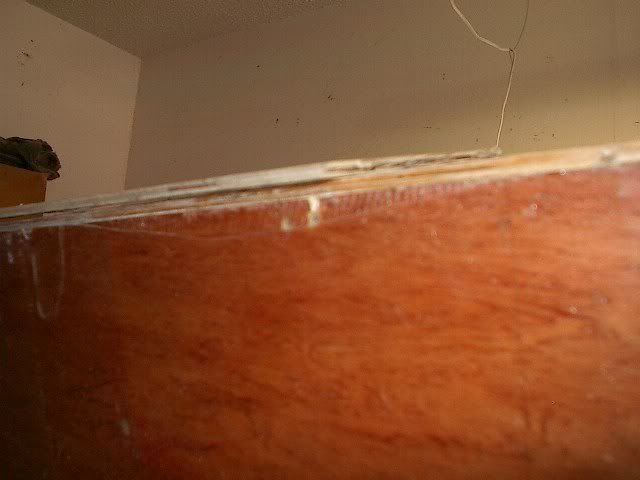
Then I glassed the deck onto the hull by overlapping the glass about 2 inches down the sides.
You can see it in this picture , it is the frosted area along the top of the sides since there is only one coat of epoxy on it.

Here is a picture of the seam when it is done , the two holes are for the deck rigging I put on the boat.

Chuck.
The reason for the 1/8th inch recess is because I made the boat from 1/8 th inch wood.
If you look closely at the picture you can see it running around to top.
This gave me a lip around the boat to drop the deck on , so everything was flush and then epoxy it in place. Running a bead of epoxy along the seam let the epoxy coat the edge of the deck , the inner part of the hull and even down onto the strip holding the deck in place.
This picture might help.
Then I glassed the deck onto the hull by overlapping the glass about 2 inches down the sides.
You can see it in this picture , it is the frosted area along the top of the sides since there is only one coat of epoxy on it.
Here is a picture of the seam when it is done , the two holes are for the deck rigging I put on the boat.
Chuck.
Remember:
Amateurs built the Ark...... Professionals built the Titanic
Visit some fine paddlers at The Southern Paddler
Amateurs built the Ark...... Professionals built the Titanic
Visit some fine paddlers at The Southern Paddler
-
tx river rat
- Posts: 989
- Joined: Wed Feb 21, 2007 10:48 pm
- Type of boat I like: <-- Please read instructions to the left and delete this text. Then, tell us what type boat you like! :-)
- Location: Tx
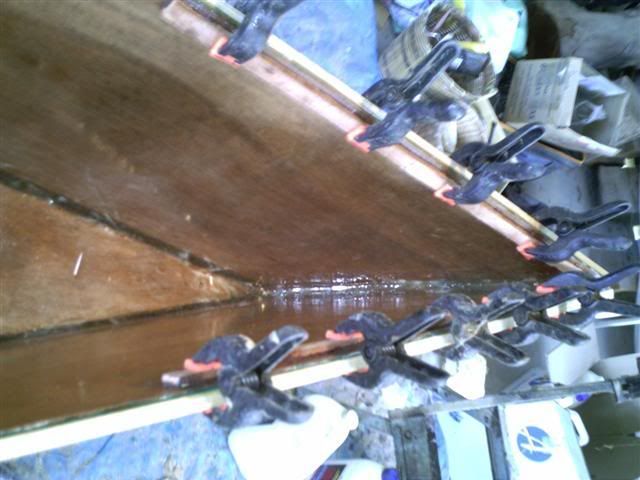
I took some pics of what I am talking about.
I put on a double shear lip 1 an 1/8 higher than the other, the one on the outside lines up with the Hull. Maybe I don't have a problem but if I round up the outside after I run my fillet it will be into the deck ply and I am not sure if the glass will turn the corner without rounding it.
In the pics you can see what I am talking about.
Ron
-
jem
- Site Admin
- Posts: 4915
- Joined: Fri Jun 18, 2004 8:14 pm
- Type of boat I like: Wooden
- Location: Greensboro, NC
- Contact:
I think I know what you're getting at.
You'll need to round the corner off in order to get the glass to stay put. If you don't want to see the color of the inner layer of plies that exposed from the sanding, you could round the seams, mask of the deck and hull and only leave the fillet area exposed, then stain the exposed area. Install the glass right over that.
If you do a good job masking, you could stain the rounded area a dark color and that will provide a nice "defining" line look to the boat.
-Matt. Designer.
-
tx river rat
- Posts: 989
- Joined: Wed Feb 21, 2007 10:48 pm
- Type of boat I like: <-- Please read instructions to the left and delete this text. Then, tell us what type boat you like! :-)
- Location: Tx
-
jem
- Site Admin
- Posts: 4915
- Joined: Fri Jun 18, 2004 8:14 pm
- Type of boat I like: Wooden
- Location: Greensboro, NC
- Contact:
pics have to be uploaded on the internet somewhere. check out
www.photobucket.com
you get a free account, upload your pictures, then they give you a link for each picture that you simply copy and paste.
www.photobucket.com
you get a free account, upload your pictures, then they give you a link for each picture that you simply copy and paste.
-Matt. Designer.
-
tx river rat
- Posts: 989
- Joined: Wed Feb 21, 2007 10:48 pm
- Type of boat I like: <-- Please read instructions to the left and delete this text. Then, tell us what type boat you like! :-)
- Location: Tx