Prototype Bluefin 12; 12' fishing SOT

Builder show and discuss their progress.
scottrunnr
Posts: 389
Joined: Sun Apr 23, 2006 8:34 pm
Type of boat I like: <-- Please read instructions to the left and delete this text. Then, tell us what type boat you like! :-)
Location: Brookline, MA

Post by scottrunnr »

I took a shot at creating a curved/single piece foredeck. I think it turned out well. I know some folks were interested in the process I used to do it.

1. Below shows the curve of the forward cockpit.
Image

2. I used 3mm ply as it had enough bend to it. Below I stitched it into place.
Image

3. Saturation coat
Image

4. With stiches still in, I applied 4oz fiberglass. Note blue tape covering stitches. I did not go to the edge of the ply with fiberglass. I let it cure for 2 days to hold shape.
Image

5. Removed the stitching and the deck from the hull. Note in photo below that it pretty much held its shape. It did flex back out a tiny bit. So I used some string in the holes from the stitching to pull the form back in a bit. I then glassed the inside with 4oz cloth.
Image

6. After curing, I stitched the deck back onto the hull and fillet'd and sanded. Then I did another layer of 4oz cloth over the entire deck and onto the hull for bonding. The extra layer of cloth gave it the strength to resist oil canning. Final results below.

Image

Image

Image
jem
Site Admin
Posts: 4915
Joined: Fri Jun 18, 2004 8:14 pm
Type of boat I like: Wooden
Location: Greensboro, NC
Contact:

Post by jem »

Very Nice!!! 8)
-Matt. Designer.
coogzilla
Posts: 101
Joined: Sat Apr 05, 2008 4:27 pm
Type of boat I like: <-- Please read instructions to the left and delete this text. Then, tell us what type boat you like! :-)
Location: Southern California

Post by coogzilla »

That is really nice work! Wow. Looks good too.

Coogs
JEMWATERCRAFT:
Touring Pirogue-
tx river rat
Posts: 989
Joined: Wed Feb 21, 2007 10:48 pm
Type of boat I like: <-- Please read instructions to the left and delete this text. Then, tell us what type boat you like! :-)
Location: Tx

Post by tx river rat »

Looks great
Ron
Manjimike
Posts: 146
Joined: Fri Aug 25, 2006 7:28 am
Type of boat I like: <-- Please read instructions to the left and delete this text. Then, tell us what type boat you like! :-)
Location: Manjimup, West Australia

Post by Manjimike »

That grain looks really good as one piece
olsnappa
Posts: 300
Joined: Mon Dec 17, 2007 7:03 am
Type of boat I like: <-- Please read instructions to the left and delete this text. Then, tell us what type boat you like! :-)
Location: Melbourne, Australia

Post by olsnappa »

Looks sensational. Nice work.
John.
1 Cape Fear Sit In....a couple more planned
2 Laker 14's
1 Paddle board

"People who don't make mistakes don't make anything"
scottrunnr
Posts: 389
Joined: Sun Apr 23, 2006 8:34 pm
Type of boat I like: <-- Please read instructions to the left and delete this text. Then, tell us what type boat you like! :-)
Location: Brookline, MA

Post by scottrunnr »

I finally finished her! This is my 2nd build. I learned a lot from my first build (tandem fishing sot) and subsequent use fishing. The most important thing I learned is that all the little details regarding weight add up quickly. My first build came in quite heavy. I'm happy to report that this one came in at 59 lbs even with all the accessories I added. That's 1 lb under my target of 60lbs!

Speaking of accessories, below are some photos of the features I added based on fishing my tandem last year and some of Mick's tricks.

I hope to get her wet for the first time one night next week and post photos.

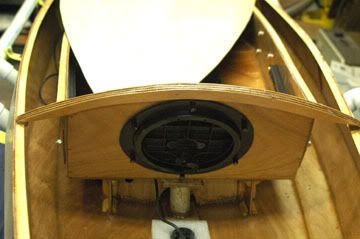
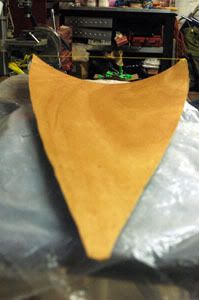
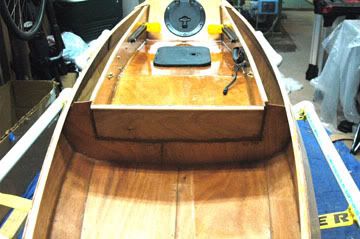
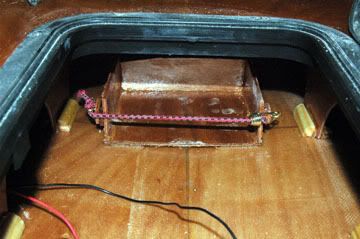
1. Rear bulkhead for storing caught fish. This photo was from before I installed the deck & hatch. While this photo doesn't show it, I mixed epoxy and a new ceramic insulating powder developed by NASA (Insuladd) and painted that in the whole rear compartment. I'm hoping it will keep my ice/fish cold back there. Also note flush hatch in cockpit floor for storing tackle boxes and fish finder battery and circular hatch in front cockpit wall for more storage.
Image

2.Drain plug in the stern for cleaning out the fish storage area.
Image

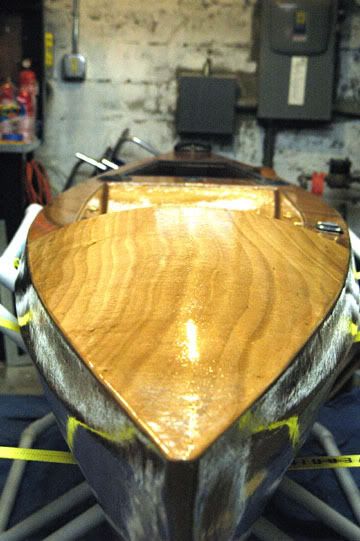
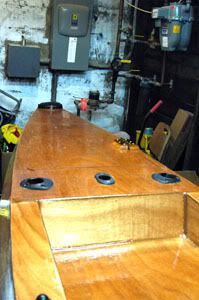
3. Aft configuation inspired by Mick for fishing. Two flush-mount angled rod holders, a central vertical rod holder for either a net or gaff, and a flush hatch with flush handle/latch for access to the fish storage area. On the very bottom left of the photo you can barely see the RAM ball for my fishfinder/gps display unit.
Image

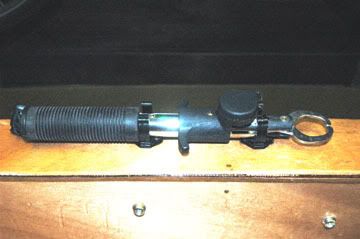
4. I got a canvas/snap kit and installed a sheath to hold my pliers on the cockpit wall.
Image

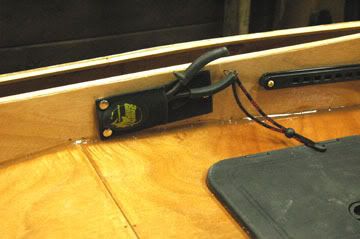
5. I installed two paddle holder clips on the cockpit deck to hold my Lip-Grip for nasty toothy Bluefish (they're wonderful to eat).
Image

6. Following Mick's idea on a camera box, I build a box for my fish finder battery below decks.
Image

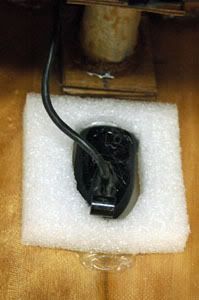
7. Fishfinder sounder mounted below deck with foam/goop to hold it in place.
Image

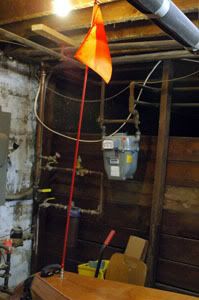
8. Screw in mount safety flag to help keep me from getting run over by the motor boaters. I've had a close call out on the ocean without this before.
Image

9. While no photo of it, I applied several layers of graphite powder/epoxy to the bottom to help protect it.
jem
Site Admin
Posts: 4915
Joined: Fri Jun 18, 2004 8:14 pm
Type of boat I like: Wooden
Location: Greensboro, NC
Contact:

Post by jem »

How about a list of accessories?
-Matt. Designer.
scottrunnr
Posts: 389
Joined: Sun Apr 23, 2006 8:34 pm
Type of boat I like: <-- Please read instructions to the left and delete this text. Then, tell us what type boat you like! :-)
Location: Brookline, MA

Post by scottrunnr »

Sure. Do you want me to note where I purchased them if applicable? Do you want me to post it here or email it to you?
jem
Site Admin
Posts: 4915
Joined: Fri Jun 18, 2004 8:14 pm
Type of boat I like: Wooden
Location: Greensboro, NC
Contact:

Post by jem »

anywhere is fine. I was more curious about how much the accessories weighed.

If you bought from competitors site that sell kits or plans, then please don't list the company.
-Matt. Designer.
Post Reply