DK - First build

Builder show and discuss their progress.
Tor
Posts: 219
Joined: Mon Jan 07, 2008 6:46 am
Type of boat I like: <-- Please read instructions to the left and delete this text. Then, tell us what type boat you like! :-)
Location: Melbourne

Post by Tor »

It appears I was a little premature with the last post :oops: .
and this is water tight, next stage the gunwhales
I think it's water tight however the next stage is the sanding. I had read many posts with the sanding, sanding, sanding comments and thought "it can't be that bad" :roll:

Appears it can, especially the inside when you didn't take the hint that it should be WELL masked between the stitches and orbital sanders don't fit on the inner fillets that well so it's all hand sand and scraper - except the runs are all uneven and the scraper doesn't work very well until it's fairly smooth.

Thank goodness there's only four joins (even if they are a mile long), next time remember to mask WELL.

Still, keeps me off the streets.

Tor
jem
Site Admin
Posts: 4915
Joined: Fri Jun 18, 2004 8:14 pm
Type of boat I like: Wooden
Location: Greensboro, NC
Contact:

Post by jem »

Yea that sanding will drive you batty.

For the hull interior, every additional minute you spend masking/prepping, saved you about 5 in sanding and re-coating.
-Matt. Designer.
Tor
Posts: 219
Joined: Mon Jan 07, 2008 6:46 am
Type of boat I like: <-- Please read instructions to the left and delete this text. Then, tell us what type boat you like! :-)
Location: Melbourne

Post by Tor »

Well it's been a little while and there's been a little progress, only a little... :cry:

I've got a bit of a cold now the weathers changed and it's kept me out of the shed, I don't like wearing a mask when I can hardly breathe anyway.

I managed to remove the excessive resin from the inside with one of these
Image
I got a rotary tool out of the job so not too unhappy and the raspy burr did a great job without creating too much fine dust.

Then I glassed the inside - the last time I'll ever do that job I'm taping the inside in future...
The bow and stern are shocking and I can now see why all these boats have decks. I used far too much resin although I don't need to sand it right back for the next coat.

So we turned it back the wrong way I made a couple of saw horses to get the canoe a bit lower and started to apply the final coats on the outside whilst the inside fully cures.
Image
I'm still getting some runs and a bit of pooling or lines where the squeegee left a trail I just need to roller off afterwards I think?
a little light sand and another coat and she'll be right.

Even though the finish is not that good I've decided to finish it in clear varnish, she may have some blemishes but I'm looking at them as warrior scars to be seen with pride (and to remind me to do it better next time).

Anzac Day launch is looking a bit dodgey now, it may have to wait until Mayday (the weekend after), but at least that gives me a long weekend to get that finishing sprint in...

Tor
Kayak Jack
Design Reviewer
Posts: 1186
Joined: Sun Jun 20, 2004 8:03 pm
Type of boat I like: <-- Please read instructions to the left and delete this text. Then, tell us what type boat you like! :-)
Location: South-central Michigan

Post by Kayak Jack »

Tor,

May I suggest a rethink on your proclamation? Glassing the inside of a boat is important - especially up to the waterline.

When your boat gets impaled on an obstacle - particularly a sharp obstacle - the glass will save your boat. Take a green stick, bend it to an acute angle, and observe the splitting and tearing that takes place on the outside edge of the angle. That is what will happen to unprotected wood on the inside of your boat's bottom.

Glassing the inside can protect your wood - your work - in that case. It will prevent, or minimize, splitting and tearing of the wood fibers. IE: it can save our boat instead of you watching as your boat gets torn and split open.

Please, rethink about glassing the inside of your next boat. I know it's a PITA to do, but it's worth it in use.
Kayak Jack
Doing what you like is FREEDOM
Liking what you do is HAPPINESS
I spent most of my money on whiskey and women - and I'm afraid I just wasted the rest.
Tor
Posts: 219
Joined: Mon Jan 07, 2008 6:46 am
Type of boat I like: <-- Please read instructions to the left and delete this text. Then, tell us what type boat you like! :-)
Location: Melbourne

Post by Tor »

Kayak Jack wrote:May I suggest a rethink on your proclamation? Glassing the inside of a boat is important
Ok I'll rethink, nah too hard.

got ya :lol: the series of piccies below shows how I cleaned up the ends and did a fillet. This canoe is far too big to contemplate an end pour but I'm going to have to work out a way to strengthen the ends so I can tie it to the car.

Anyways as I will make a better job of the next one and cut the glass better (smaller pieces) I will glass the inside.

the start :oops:
Image
cut out the loose bits
Image
little stiff fillet material
Image
and a little more with a quick brush with extra resin to smooth out.
Image
Things to remember keep resin off things you don't want it on and resin cleans up easier before it cures :oops:

gotta do the other end too

Also cut the pieces to make a slotted gunwhale only to find that I wasn't very good at converting my 10x2 plank into decent strips, looks like I've a little more sawdust to create.
Image

frames gunwhales and decks next...

Tor
DAVE
Posts: 1
Joined: Wed Apr 02, 2008 5:34 pm

Post by DAVE »

TO REMOVE EPOXY DRIPS AND RUNS
TRY HEAT GUN AND SCRAPER
TAKE CARE
NO SCORCHING
EPOXY SOFTENS EASY WITH A LITTLE HEAT
Tor
Posts: 219
Joined: Mon Jan 07, 2008 6:46 am
Type of boat I like: <-- Please read instructions to the left and delete this text. Then, tell us what type boat you like! :-)
Location: Melbourne

Post by Tor »

and I thought the pictures were small enough to hide the runs... :oops:
Tor
Posts: 219
Joined: Mon Jan 07, 2008 6:46 am
Type of boat I like: <-- Please read instructions to the left and delete this text. Then, tell us what type boat you like! :-)
Location: Melbourne

Post by Tor »

well it sort of all came together this weekend.
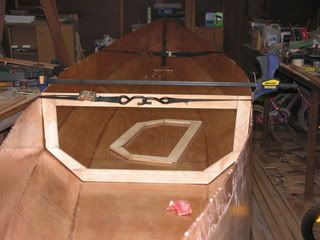
install the hatches

Image

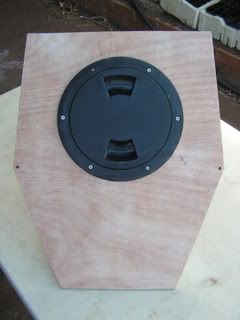
the one at the front is a small one for the little bits you need, so I installed a biscuit barrel...
Image
Image
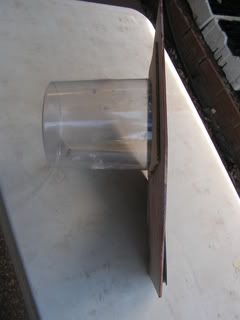
the ply collar fits around a lip on the barrel holding it in place
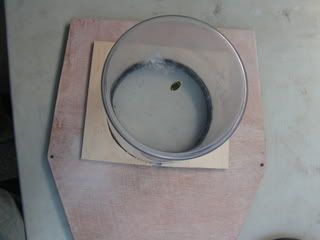
Image
and it fits in thus
Image

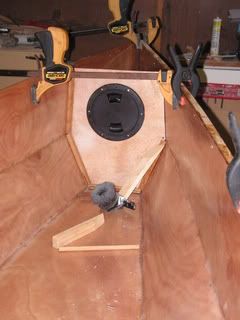
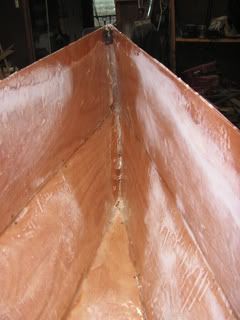
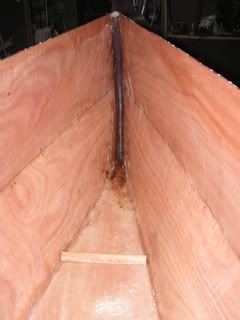
Then decided it was time to get the frames and gunwhales fitted this is where the fun started.

look at the gap

Image

all the time upside down after the frames were removed has pushed out the sides...
the frames were screwed in place during the fibre glassing so I know they were aligned when that was done

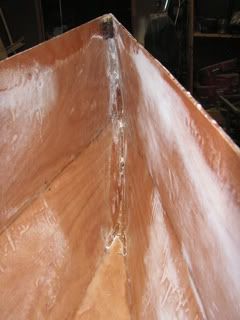
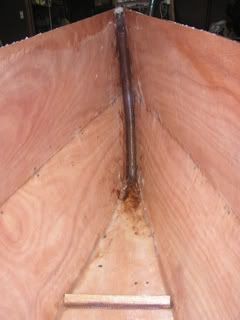
I pulled them back together
Image
Image
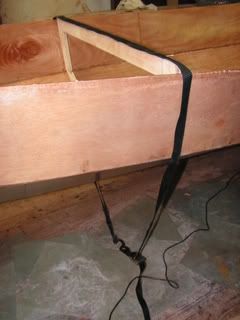
the strap being replaced by a clamp as the gunwhales were installed
Image

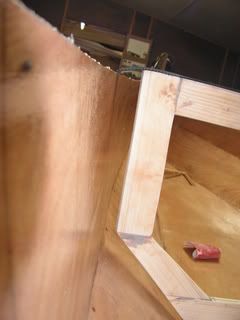
it's not easy to see but there's a slot in the frames which the inner rail will run.
I'm hoping that the inner rail running through the frame will be enough to spread the force of the sides just pulling away from the frames (the frames are 10mm hoop pine rather than 4mm ply)

I'm still concerned that the sides may just want to spring back out... :? if this was a building I'd put in a strainer bar - any other suggestions?

I'm decking the ends
Image
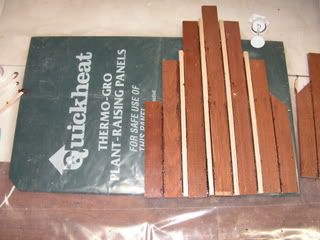
the heat pad helped cure the glue, and a little cutting and planing
Image
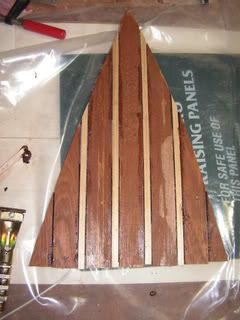
still need to fill and sand but you get the idea (and this is all your fault)
"Your" being anyone who builds and comments here and on other building forums.
Each time there's a job to do the standard gets higher ply deck/wooden deck/feature deck/contrasting wooden feature deck you know the evolution... :lol:

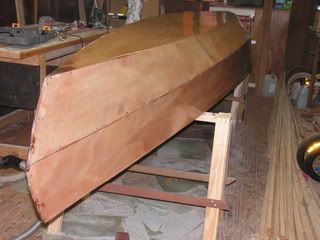
it almost looks like a canoe :)

Tor
jem
Site Admin
Posts: 4915
Joined: Fri Jun 18, 2004 8:14 pm
Type of boat I like: Wooden
Location: Greensboro, NC
Contact:

Post by jem »

She's looking real good! :D
-Matt. Designer.
Tor
Posts: 219
Joined: Mon Jan 07, 2008 6:46 am
Type of boat I like: <-- Please read instructions to the left and delete this text. Then, tell us what type boat you like! :-)
Location: Melbourne

Post by Tor »

thanks Matt,

I was thinking if I put a piece of tensioned cable running from one side to the other along the frames with big washers that I "hide" in the gunwales this would prevent the sides springing back out. It's not clear from the picture but it's about 1.5" out at the top s there is a fair amount of tension.

any comments?

Tor
Post Reply