Dan;
Just some thoughts.
You might want to try a different type of tape than the blue painters tape. Maybe a test with some 3M Fine Line tape, and really press it onto the wood good. I would use a clean cloth under my thumb and really work it on. Besides the woods capillary action you are also trying to seal the top surface of the panel, imagine a whole bunch of really tiny canals running under the tape.
Another thought, maybe thinner coat of dye, but more of them to build up the color. I am thinking a airbrush type of delivery system, instead of flooding the surface with a brush. No experience with dyes so I dont even know if more coats would work to build up color.
DM
Dan's Pelagic
-
dangermouse01
- Posts: 200
- Joined: Mon Jul 31, 2006 6:32 pm
- Type of boat I like: <-- Please read instructions to the left and delete this text. Then, tell us what type boat you like! :-)
- Location: Palm Bay, FL (east coast)
-
Teddy Madison
- Posts: 79
- Joined: Thu Apr 24, 2008 4:36 pm
- Type of boat I like: <-- Please read instructions to the left and delete this text. Then, tell us what type boat you like! :-)
- Location: Rhode Island, United States
The "press it onto the wood" bit gave me another idea. What if you dipped a rag in the dye and rubbed it into the wood? It would take longer and probably need a few coats but this may work. Less saturation/more control.dangermouse01 wrote:Dan;
Just some thoughts.
You might want to try a different type of tape than the blue painters tape. Maybe a test with some 3M Fine Line tape, and really press it onto the wood good. I would use a clean cloth under my thumb and really work it on. Besides the woods capillary action you are also trying to seal the top surface of the panel, imagine a whole bunch of really tiny canals running under the tape.
Another thought, maybe thinner coat of dye, but more of them to build up the color. I am thinking a airbrush type of delivery system, instead of flooding the surface with a brush. No experience with dyes so I dont even know if more coats would work to build up color.
DM
Wayne
-------------
Free Laker - In Progress!!!
-------------
Free Laker - In Progress!!!
-
Kayak Jack
- Design Reviewer
- Posts: 1186
- Joined: Sun Jun 20, 2004 8:03 pm
- Type of boat I like: <-- Please read instructions to the left and delete this text. Then, tell us what type boat you like! :-)
- Location: South-central Michigan
-
tw541
- Posts: 73
- Joined: Thu Feb 28, 2008 8:19 pm
- Type of boat I like: All boats
- Location: Mountain Home, Arkansas
I've used these types of bright color dyes before and it is possible to get a sharp line. Like dangermouse said, use the 3M Fine Line Tape. It really is better for this. And like Teddy Madison said, use a rag, but it needs to be almost dry. You should have to rub it pretty good to get it to color the wood. If it colors it on the first few wipes, it is too wet. It needs to be almost dry. Dip a small corner of the rag and wipe it off on paper towels. Then wipe it some more. Then wipe it on scrap wood untill it is almost dry. When you think it is too dry, it is just about right.
Terry
-
AlohaDan
- Posts: 293
- Joined: Sun Apr 15, 2007 9:36 pm
- Type of boat I like: <-- Please read instructions to the left and delete this text. Then, tell us what type boat you like! :-)
Thanks for the tips guys, but I've already stained stuff. Too much of a hurry.
I did find staining the glass for reinforcing butt joints helps.
Back to building. I've read the popsicle thread.
But I notice just from the first set of panels edges press up pretty close in a lot of places.
From the stand point of providing more thorough waterproofing, versus spacers to ensure peanut butter glue bonds joints, should I apply epoxy to the edges before stitching ?
-
AlohaDan
- Posts: 293
- Joined: Sun Apr 15, 2007 9:36 pm
- Type of boat I like: <-- Please read instructions to the left and delete this text. Then, tell us what type boat you like! :-)
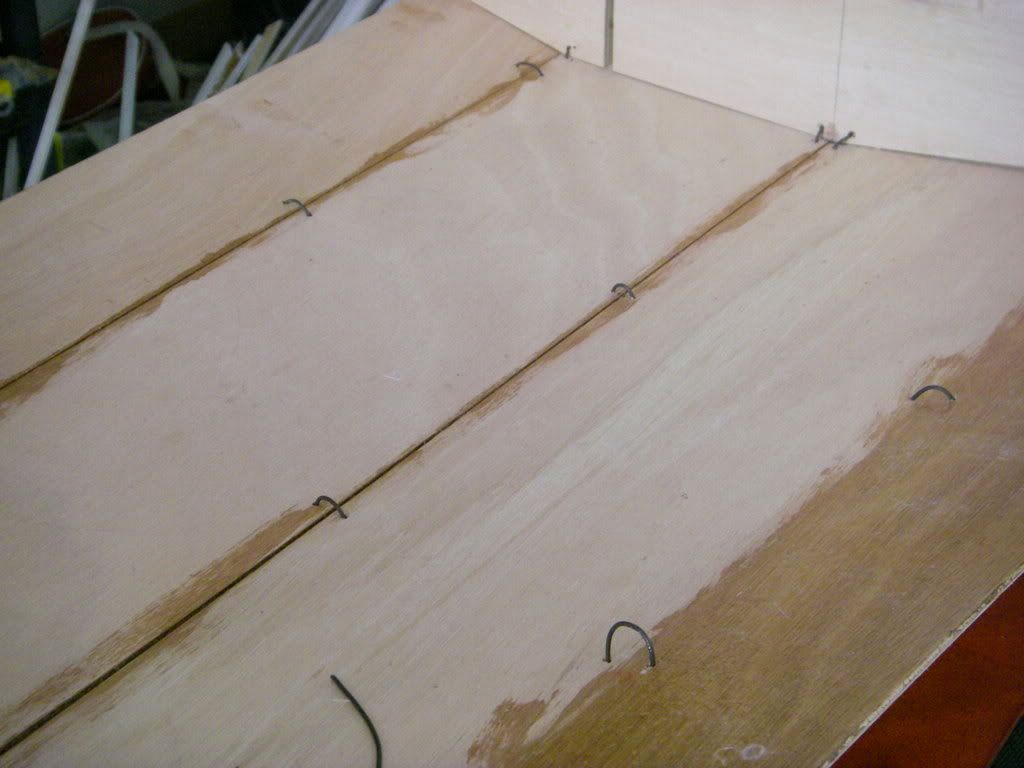
New problem.
Stitched panel 1, folded out, stitched cross members. As pic shows looking like it's starting to line up with more cross members.
Ready to stitch panel 2 to panel 1.
BUT instructions read
17. Stitch Panels B
• Align the panel splice seams, stitch from mid ship out to the ends.
• Stitch Panels B to the frames after stitching to Panels A.
Note for kibitzers. Matt is using panel 1,2,3, etc versus panel A<B<C,etc terminology for this model.
The splices seams are way too different . At least 6-8 inches.
So how do I start at middle ensuring panel 1 & 2 are matched up if I can't use splice butt mark?
Would I first stitch panel 2 to a cross member(s)? If so which one(s) ?
Guessing #3 then #4. Then do panel 2 to panel 1, then other cross members ?

Or on this model is there a center ref point or something?
Stitched panel 1, folded out, stitched cross members. As pic shows looking like it's starting to line up with more cross members.
Ready to stitch panel 2 to panel 1.
BUT instructions read
17. Stitch Panels B
• Align the panel splice seams, stitch from mid ship out to the ends.
• Stitch Panels B to the frames after stitching to Panels A.
Note for kibitzers. Matt is using panel 1,2,3, etc versus panel A<B<C,etc terminology for this model.
The splices seams are way too different . At least 6-8 inches.
So how do I start at middle ensuring panel 1 & 2 are matched up if I can't use splice butt mark?
Would I first stitch panel 2 to a cross member(s)? If so which one(s) ?
Guessing #3 then #4. Then do panel 2 to panel 1, then other cross members ?
Or on this model is there a center ref point or something?
-
jem
- Site Admin
- Posts: 4915
- Joined: Fri Jun 18, 2004 8:14 pm
- Type of boat I like: Wooden
- Location: Greensboro, NC
- Contact:
Oops.
The panel splice seams are different on yours for the #1 and #2 panels.
You could go one of 2 ways: Align by the stern end of the panels or align by the frame reference lines you drew.
For additional reference the #1 panel seam should be 5-7/16" forward of the panel #2 aft seam.
The panel splice seams are different on yours for the #1 and #2 panels.
You could go one of 2 ways: Align by the stern end of the panels or align by the frame reference lines you drew.
For additional reference the #1 panel seam should be 5-7/16" forward of the panel #2 aft seam.
-Matt. Designer.
-
AlohaDan
- Posts: 293
- Joined: Sun Apr 15, 2007 9:36 pm
- Type of boat I like: <-- Please read instructions to the left and delete this text. Then, tell us what type boat you like! :-)
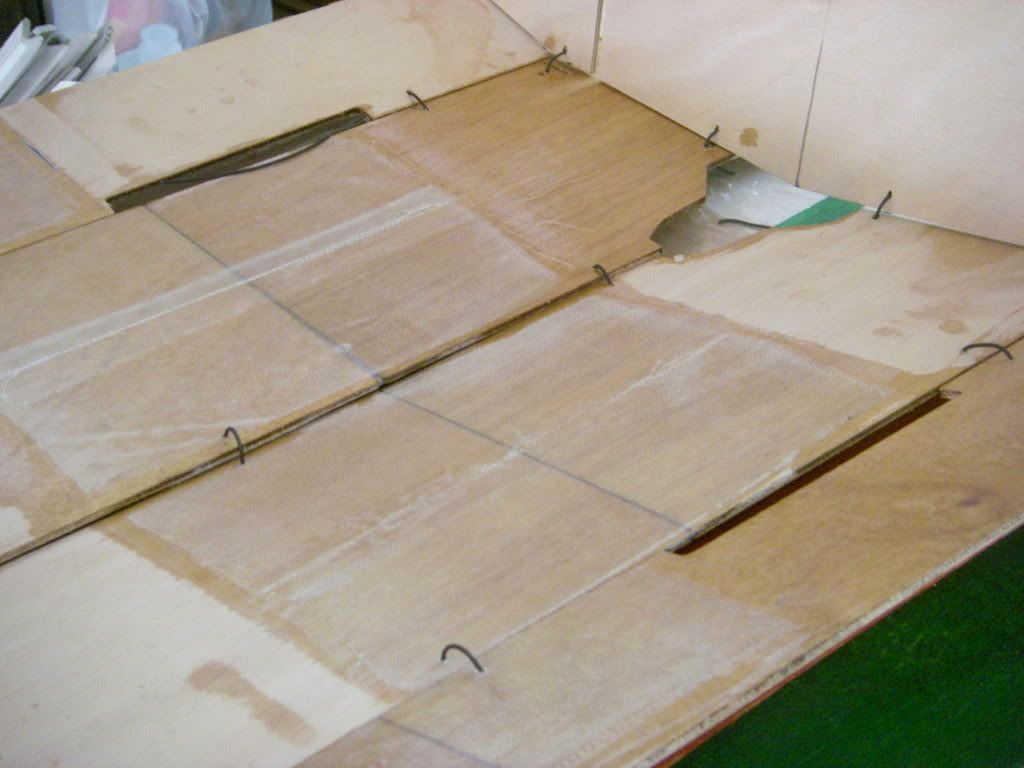
OK
Yesterday I played with the frame reference lines on a piece of paper and a cut out. Realized I had over complicated measurement. Went back and ripped out cross members and remeasured finding a couple of .5-.75 inch errors.
Thought about it some more, so I used frame reference lines as adjoining panel stitching locators.
The alignment (although yak is not on even keel in below shot) looks a lot better.
And the panels seams came out with a 32 to 16th of 5 & 7/16" (edit) you provided. Nice X check.
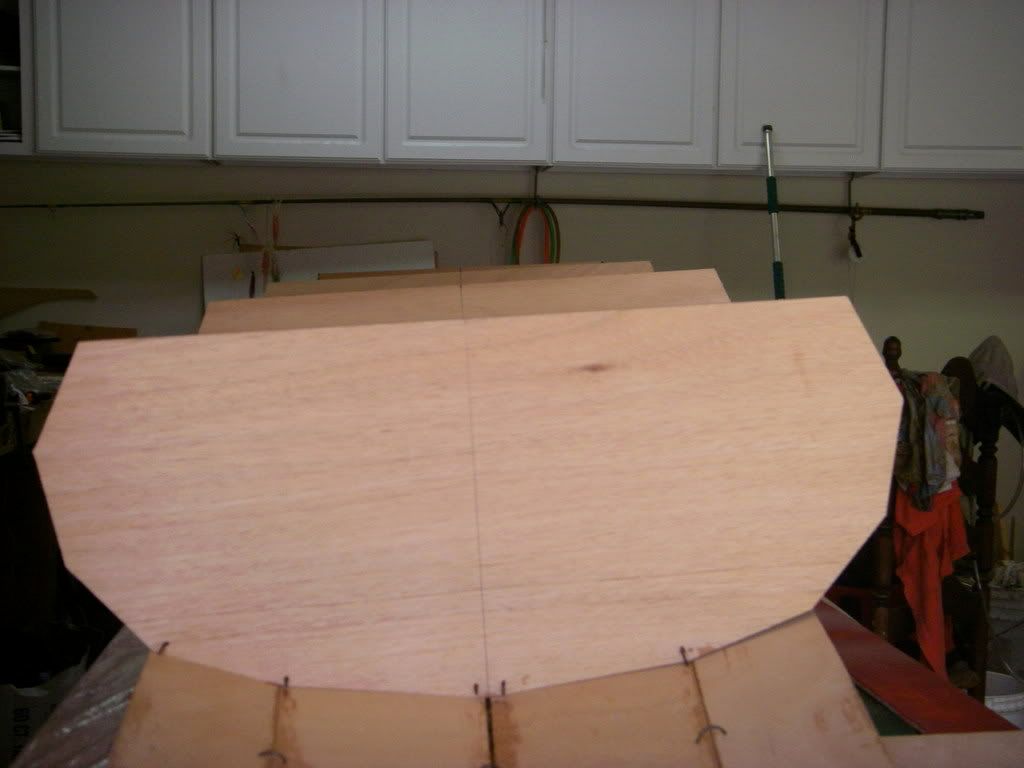
How's my stitching? OK?
And showing center where wood will be tight against wood when I pop that centerline edge down:
For kibitzers, Matt had to change seam due to dagger board slot as pictured above. The port hole will be filled in as the CNC did it's mirror image copies.
Yesterday I played with the frame reference lines on a piece of paper and a cut out. Realized I had over complicated measurement. Went back and ripped out cross members and remeasured finding a couple of .5-.75 inch errors.
Thought about it some more, so I used frame reference lines as adjoining panel stitching locators.
The alignment (although yak is not on even keel in below shot) looks a lot better.
And the panels seams came out with a 32 to 16th of 5 & 7/16" (edit) you provided. Nice X check.
How's my stitching? OK?
And showing center where wood will be tight against wood when I pop that centerline edge down:
For kibitzers, Matt had to change seam due to dagger board slot as pictured above. The port hole will be filled in as the CNC did it's mirror image copies.
Last edited by AlohaDan on Sun May 04, 2008 9:30 pm, edited 1 time in total.