Page 1 of 5
Quetico
Posted: Wed Aug 22, 2012 10:22 pm
by rodot
Yippee! I've got the plans and I'm rearing to go. Thanks Matt, it looks fantastic. I really am excited about building this boat and I just hope I can do the design justice.
I have got some 3mm. gaboon which I will be using, but looking at the plans, in retrospect I probably should have gone 4mm. Some of those panels are awfully skinny and will require a bit of TLC. Anyway, there are 7 frames so that should help keep things in line. I will now be going out to order some 4oz. cloth. This should build a pretty lightwieght craft, but being a geezer, I won't be subjecting it to any real punishment.
Cheers Roger
Re: Quetico
Posted: Thu Aug 23, 2012 11:32 pm
by rodot
Started on marking out the panels. I've found that the plastic fibre cement cover strips make a pretty reasonable and cheap lofting rod.
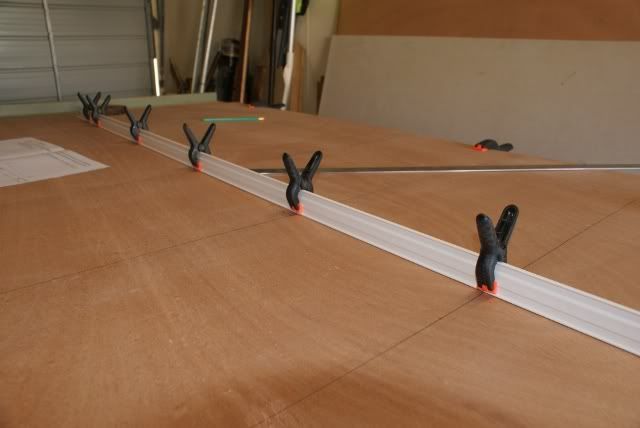
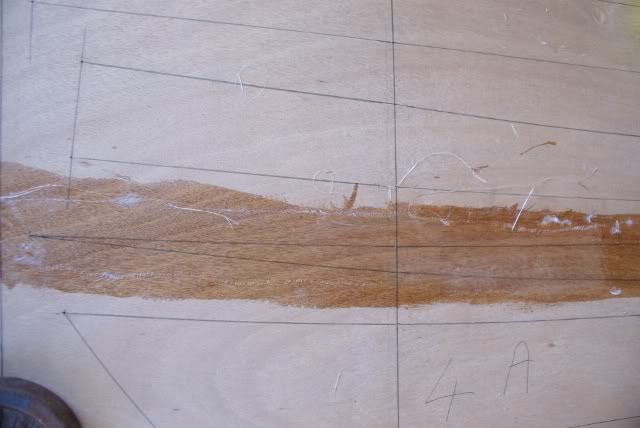
The number 5 panels sure are skinny. Followed Matt's advice and fibreglassed the pointy bits before cutting.
Now to wait for the epoxy to set before cutting out the panels.
Re: Quetico
Posted: Fri Aug 24, 2012 7:31 pm
by rodot
I'm just adding a couple of photos showing why I love my Japanese Pull Saw.
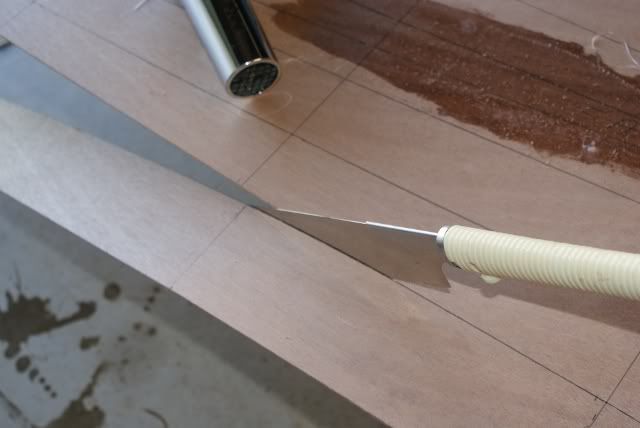
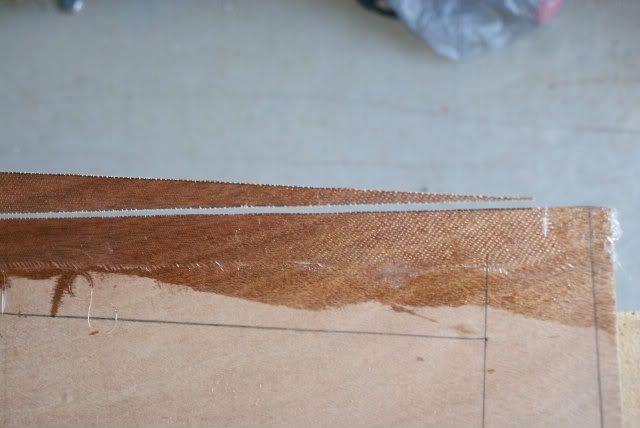
With this saw I can cut right up to the line without any splintering and minimal sanding. Because of my emphysema I have been using a hair dryer to blow the sawdust away from the cut so I can see the line clearly and it works a treat.
Re: Quetico
Posted: Mon Aug 27, 2012 10:53 am
by LesForgue
Congrats Rodot on your good start.
Thanks for that hair dryer tip for instant clearing of the sawdust.
That is a neat saw there, not only neat but necessary, as I'd never expect a power jig saw to handle a job like that super-narrow panel tip, which your oull saw seems to handle perfectly.
Looking forward to future episodes of your builder log.
(I'm not just curious, I'm learning from these logs.)
Re: Quetico
Posted: Mon Aug 27, 2012 6:31 pm
by FloatingFisher
rodot, could you post some more info about that saw please?
Re: Quetico
Posted: Tue Aug 28, 2012 2:33 am
by rodot
rodot, could you post some more info about that saw please?
The Japanese pull saw as the name implies works on the pull stroke, not the push. Because of this they can have a very thin blade with no offset to the teeth. I have two of these saws as shown in the picture. One has a hard spine and the other has not. The one I use the most is the one with the hard spine. It seems to follow the curves in the panels just as easily as the one without the spine. The blade in this saw is only 0.2mm thick. When cutting ply I use it at a very shallow angle and it slices through the thin ply very quickly indeed. It is also very accurate. It might be just me, but I find that I am all over the place with a jig saw and spend a far greater extra time sanding back to the line. The main drawback I see with the pull saw is the cost. In Australia where I live they are about 50 bucks each. They also need to be protected as they rust very quickly if left exposed to the elements.

Re: Quetico
Posted: Wed Aug 29, 2012 10:42 pm
by Mick
G'day Roger,
Mate, where did yo buy those saws? I bought one from Duckworks
http://www.duckworksbbs.com/tools/pullsaws/index.htm
and love it but would love to shop locally.
Re: Quetico
Posted: Wed Aug 29, 2012 11:02 pm
by OnkaBob
Mick,
I have a couple of the "Tradesman quality Z saw" range (cross cut flexible and general purpose) available from Carbatec. I believe Carbatec have branches in all states.
http://www.carbatec.com.au/tradesman-qu ... saws_c5710
They also have other brands but I have not tried them. Very happy with the Z saws. These are the only saws I have ever been able to cut accurately with and they leave a very smooth edge as well

.
Re: Quetico
Posted: Thu Aug 30, 2012 12:05 am
by rodot
Hi Mick
What Bob said mate. Carbatec's the go. All kinds of beaut toys.
Roger
Re: Quetico
Posted: Sun Sep 02, 2012 7:26 pm
by rodot
Time for a progress report on the Quetico. Still plodding along. The panels have been cut out and butt joined with fibreglass cloth. So far, so good. Took the panels out for a photoshoot while I swept out the shed.
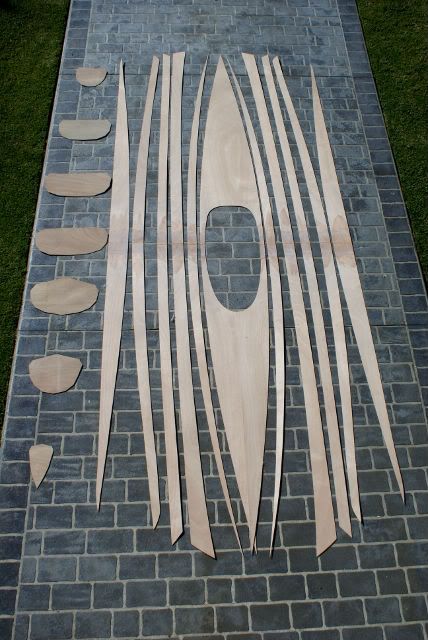
Now I have to mark out the position for the frames, drill some holes for the stictching and start the fun part. I am thinking that for this one I will place the stitches about 8inches apart. They are skinny panels and only thin ply.