Jcubero's Merrimac

Builder show and discuss their progress.
jcubero
Posts: 64
Joined: Thu Aug 10, 2006 11:43 pm
Type of boat I like: <-- Please read instructions to the left and delete this text. Then, tell us what type boat you like! :-)
Location: Orlando, Florida

Post by jcubero »

epoxy & wood flour, check. I keep thinking that's only for fillets and gap-filling. Just put gunwale on other side using proper mix. The good news is the first side seems to be quite solid with epoxy only. I did saturate both surfaces yesterday, and then applied epoxy to both surfaces when glueing. Time will tell. I'll do a shear test, and if it doesn't pop off we'll run with it.

We also put the first coat on the inside. Much easier than glassing ;) I'm noticing that canoe bottom is slicker than Chuck trying to get a free drink. I can only imagine that when wet and barefoot it'll be like a slip n' slide!
What do you guys do for traction on the bottom? I was thinking about adding something like .... sand or somesuch to the surface after the next epoxy coat. Or maybe it's better to put on traction strips afterwards? Hey, maybe I can get some bathtub stickies shaped like little fish for the bottom! :lol: :lol:
--
Javier
Kayak Jack
Design Reviewer
Posts: 1186
Joined: Sun Jun 20, 2004 8:03 pm
Type of boat I like: <-- Please read instructions to the left and delete this text. Then, tell us what type boat you like! :-)
Location: South-central Michigan

Post by Kayak Jack »

Don't get all goosey about traction. Try it as is first; I've never had a problem with plain epoxy.
Kayak Jack
Doing what you like is FREEDOM
Liking what you do is HAPPINESS
I spent most of my money on whiskey and women - and I'm afraid I just wasted the rest.
hairymick
Design Reviewer
Posts: 1965
Joined: Wed Jan 04, 2006 8:54 am
Type of boat I like: <-- Please read instructions to the left and delete this text. Then, tell us what type boat you like! :-)
Location: Queensland, Australia
Contact:

Post by hairymick »

Hi Javier,

Don't panic mate. you're going real well. :D
Mick - great suggestion. Now you tell me. It must be easier for you since your canoes start upside down I'll try that on the next one. In spite of inside glassing, there WILL be a next one. I did use spring clamps to help hold the cloth on the sides, which did help some.
The inside is still a pain to do, no matter how you start out. There is a post somewhere here of a bloke with his boat on saw horses. there are uprights clamped to one side of them and he has his boat leaning with the bottom against the uprights. I tried that with my wadefish and it was a lot easier to get the glass to stick down into the deep concave areas.

When preparing to glass the inside, I lay it up as mentioned trim of the overhang and put it asiide. There is allmost enough trimmed off to do the other side. It just means lots of overlaps and lots of sanding. I also use lots of offcuts for the end bits, again with lots of overlaps. I incorporate the serveral overlaps into a serious fillet in the ends ( wet on wet.)
Posted: Fri Sep 01, 2006 8:45 pm Post subject:

--------------------------------------------------------------------------------

OK, question about gunwales:

I'm doing inwale and outwale. As you guys saw, I've placed 1/4" spacers on the inside, I'm planning a 1/4" inwale strip from mahogany and 1/2" outwale also from mahogany.

I put the first piece on, and I'm concerned. There's quite a bit of torque on the boards to conform to the canoe sides.
Your gunwhale set up is similar to that on my swampgirl, only I used Australian spotty gum. I think you are talking about edge bend where the gunwhales need to not only bend round the shape of the hull but curve upwards from the centre to the ends.

I did a dry run. By that, I mean I fitted the outwhale first without glue and while they were clamped to the sides, I drilled a series of holes through the boat and into the outwhale. starting from the centre and working towards the ends

When I was satisfied with the fit, I took them off, covered the things with epoxy & woodflour and re-fitted them using pan head wood screws. I screwed through the ply and into the outwhales, again starting from the centre and working towards the ends. I did both sides of the boat at the same time alternating from side to side.

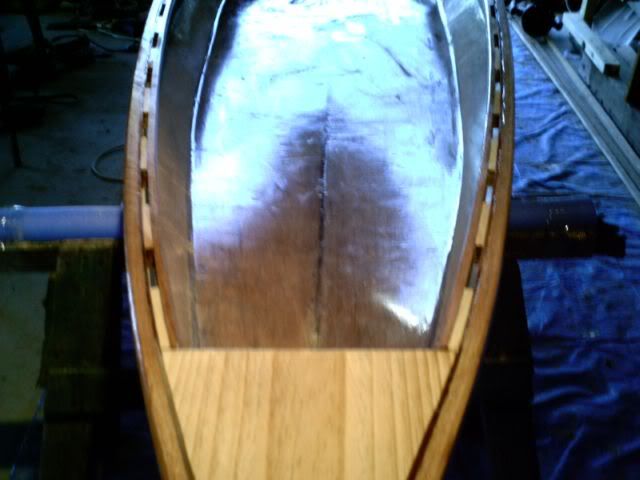
This pic doesn't really show what i mean but highlights the similarities in gunwhale set ups.
Image

When the glue had set, I did the same thing with the inwhales. By working from the centre out and towards both ends at the same time, i was able to gradually put the edge bend in that i needed.

hope this helps a bit mate.
Regards,
Mick

JEMWATERCRAFT Swampgirl; Wadefish;Touring Pirogue;South Wind; P5 ;
Laker X 2, Sasquatch 16.5 T-V 15 Okwata 15:
Cobia 15 (under construction)
jcubero
Posts: 64
Joined: Thu Aug 10, 2006 11:43 pm
Type of boat I like: <-- Please read instructions to the left and delete this text. Then, tell us what type boat you like! :-)
Location: Orlando, Florida

Post by jcubero »

It sure does, Mick! Great pics - it does look very similar to what I'm doing. I'll post some more pics tomorrow.
--
Javier
Oldsparkey
Design Reviewer
Posts: 1272
Joined: Sat Jun 19, 2004 11:08 am
Type of boat I like: Wood boats .
Location: Somewhere around Central Florida
Contact:

Post by Oldsparkey »

All I ever do is to measure the strip I am going to use, fasten it in place with some clamps and then trim it to fit. Remove the strip, epoxy saturate the spacers and epoxy the strip then put it in place.
I start at the center and work to the ends, forming the strip to the contour of the boat. Let it sit overnight and remove the clamps in the morning.

I have never had a problem with any of the strips coming loose from any of the boat's I have made.

The inside of my boats are glassed and varnished and I don't slip around in them. If you are worried about slipping , Wear some rubber soled deck shoes, they don't slip.

Now , Who said ......Free Drinks?

Chuck.
Remember:
Amateurs built the Ark...... Professionals built the Titanic
Visit some fine paddlers at The Southern Paddler
jcubero
Posts: 64
Joined: Thu Aug 10, 2006 11:43 pm
Type of boat I like: <-- Please read instructions to the left and delete this text. Then, tell us what type boat you like! :-)
Location: Orlando, Florida

Post by jcubero »

She's almost done! Today was a big day and we worked on her from morning to just now (12:30 am). We did some sanding, installed the rest of the gunwales, then took the canoe out to the grass so we could sit inside and check where we wanted the thwarts. I measured cut and installed the thwarts. Then everything got a nice coat of epoxy. The only thing left is one more coat of epoxy on the gunwales and one more coat of graphite on the bottom. Here's the pics:

Image
Image
Image
Image
Image

Of course, I see a bunch of things that bother me :? But I'm picky. I more than got my ten-foot finish, and in 3-4 weeks I'll do some fairing and fix whatever still bugs me.
Tomorrow will be a quick test run in the pond behind the house. Monday we're going on the Wekiva!

:D :D :D Thanks everyone for all your help and advice!! This went better than I imagined possible and I'm thrilled with the results. I learned a whole lot during this build. I keep finding my self saying, "Next time I'll..." so I'm sure I'll be building another boat, although I'm going to take a long break to enjoy this one first.
I'll post pics from the Labor Day trip on Southern Paddler and just generally continue being obnoxious :twisted:
--
Javier
hairymick
Design Reviewer
Posts: 1965
Joined: Wed Jan 04, 2006 8:54 am
Type of boat I like: <-- Please read instructions to the left and delete this text. Then, tell us what type boat you like! :-)
Location: Queensland, Australia
Contact:

Post by hairymick »

G'day Javier,

Let me be the first to congratulate you mate. That is more than just a beautiful boat, beautifully made. That one is a work of art.

You have raised the bar with your skill and craftsmanship and it has been a pleasure to watch your project from start to finish. Thank you very much mate for sharing. :D :D

God bess your beautiful boat,
And all who paddle in her.

May she track straight and true,
And allways find water deep and clear.

May the sun shine always on your back
and wind and tide be your friend
Regards,
Mick

JEMWATERCRAFT Swampgirl; Wadefish;Touring Pirogue;South Wind; P5 ;
Laker X 2, Sasquatch 16.5 T-V 15 Okwata 15:
Cobia 15 (under construction)
scottrunnr
Posts: 389
Joined: Sun Apr 23, 2006 8:34 pm
Type of boat I like: <-- Please read instructions to the left and delete this text. Then, tell us what type boat you like! :-)
Location: Brookline, MA

Post by scottrunnr »

She's beautiful! What a great job you and your family have done! It's wonderful that you all built her together.

Enjoy!
Kayak Jack
Design Reviewer
Posts: 1186
Joined: Sun Jun 20, 2004 8:03 pm
Type of boat I like: <-- Please read instructions to the left and delete this text. Then, tell us what type boat you like! :-)
Location: South-central Michigan

Post by Kayak Jack »

Nothing I can add two what the good guys already said. Keep up the good work!
Kayak Jack
Doing what you like is FREEDOM
Liking what you do is HAPPINESS
I spent most of my money on whiskey and women - and I'm afraid I just wasted the rest.
jcubero
Posts: 64
Joined: Thu Aug 10, 2006 11:43 pm
Type of boat I like: <-- Please read instructions to the left and delete this text. Then, tell us what type boat you like! :-)
Location: Orlando, Florida

Post by jcubero »

I just realized I never posted a picture since I put the seats in. Here goes:

Image


The seats were very easy to put in. The only trick was measuring the width of the canoe at the exact spot where the seats would be installed, since the profile of the canoe changes greatly in width from top to bottom.
--
Javier
Post Reply