I mean WOW! I bet you never chopped your frame ends off with a ceiling fan. Keep that thing away from the upper Texas coast, you'll make us look bad.
Beautiful build DM.
dangermouse01 builds a Wadefish 2.0
-
Paddlin4Reds
- Posts: 2
- Joined: Thu Aug 23, 2007 11:12 pm
-
pogue3one
- Posts: 64
- Joined: Fri Jun 22, 2007 5:15 pm
- Type of boat I like: <-- Please read instructions to the left and delete this text. Then, tell us what type boat you like! :-)
- Location: Katy, TX
Scupper tubes
DM, what are the scupper tubes made of and did you use epoxy to secure them?
Wadefish (complete)
-
dangermouse01
- Posts: 200
- Joined: Mon Jul 31, 2006 6:32 pm
- Type of boat I like: <-- Please read instructions to the left and delete this text. Then, tell us what type boat you like! :-)
- Location: Palm Bay, FL (east coast)
Re: Scupper tubes
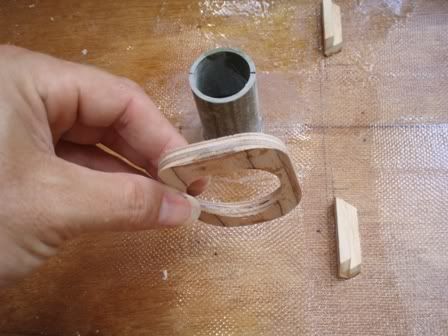
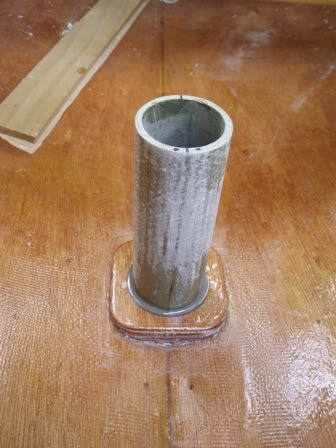
My scupper tubes are 1.50" OD X 1.25" ID fiberglass tube that I got from McMaster-Carr http://www.mcmaster.com/ part number 8535K72pogue3one wrote:what are the scupper tubes made of and did you use epoxy to secure them?
Scottrunnr's Tandem Fishing SOT build page (Page 6) has a link to another place to get tubes.
Mine are epoxied in, I made some squares from scrap 4mm ply and drilled a 1.50 dia hole thru some and a larger hole thru the others. Then epoxied one of each together. Made up 4 glue ups total, 2 for each tube, 1 for the top, 1 for the bottom.
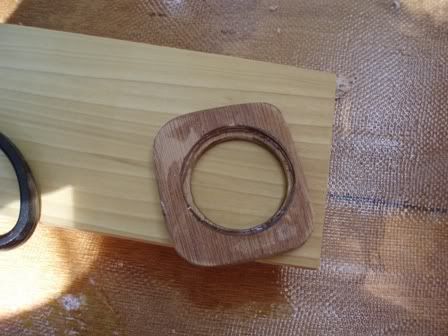
Trimmed and shaped the ones for the bottom on the belt sander. The larger hole is on the side with out the curve.
The using the cockpit and tankwell to locate the tube and keep them in place. I traced the out line of the tube at the hull and gooped some cabosil thicken epoxy inside the outline and set the tube into it, still using the CP and TW as guides.
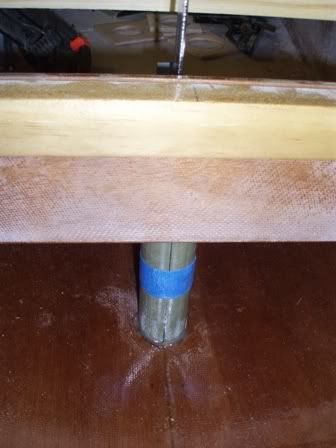
After that cured, carefully remove the TW & CP, mixed up more cabosil/epoxy and gooped it at the base of the tube, then slide the bottom plate down into it.
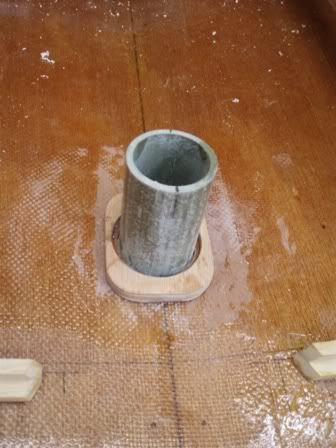
Then filled the ring on the top side with cab/epoxy, also poured some into the bottom of the tube to make sure any gaps were filled.
Top plate was about the same, the supports on the side of the tube are epoxied on first, then the plate sits on those
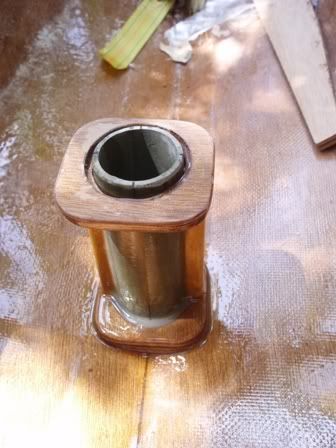
and the top is gooped with the cab/epoxy and the the CP or TW is brought down on top of it.
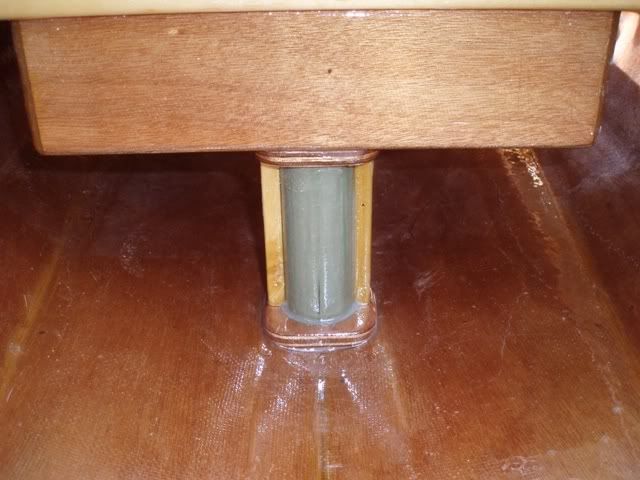
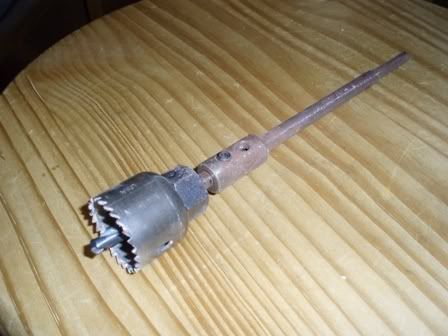
Then when it is time to cut the hole thru the hull, a 1.25" hole saw on an drill extender fits right inside the tube.
Oh yeah, every thing was given two coats of plain epoxy along the way.
Hope this helps.
DM
-
dangermouse01
- Posts: 200
- Joined: Mon Jul 31, 2006 6:32 pm
- Type of boat I like: <-- Please read instructions to the left and delete this text. Then, tell us what type boat you like! :-)
- Location: Palm Bay, FL (east coast)

-
scottrunnr
- Posts: 389
- Joined: Sun Apr 23, 2006 8:34 pm
- Type of boat I like: <-- Please read instructions to the left and delete this text. Then, tell us what type boat you like! :-)
- Location: Brookline, MA
-
dangermouse01
- Posts: 200
- Joined: Mon Jul 31, 2006 6:32 pm
- Type of boat I like: <-- Please read instructions to the left and delete this text. Then, tell us what type boat you like! :-)
- Location: Palm Bay, FL (east coast)
Mike;FlaMike wrote:Looking forward to seeing pics of her on the water.
Heres a picture of it close to the water, from last weekend at it's very first launching.

I do have some pictures of it on the water, being paddled by my girlfriend. The thing is, she is not wearing a PFD (it was in the boat, which is good enough for Florida law, I believe in wearing them) in the photos. And I am not going to post a photo of somebody paddling a boat and not wearing a PFD on Matt's site. So until I get it out on the water again and get some appropriate photos, this will have to do.
DM
-
Manjimike
- Posts: 146
- Joined: Fri Aug 25, 2006 7:28 am
- Type of boat I like: <-- Please read instructions to the left and delete this text. Then, tell us what type boat you like! :-)
- Location: Manjimup, West Australia
Re: dangermouse01 builds a Wadefish 2.0
I don't think there are to many professionals that will match your skilldangermouse01 wrote: Of course, for those of you following along here is my disclaimer:
1. I am neither a professional kayak builder nor a kayak designer.
This Wadefish 2.0 will be my third built, but my first JEM Watercraft designed kayak...DM
Cheers Mike