dangermouse01 builds a Wadefish 2.0

Builder show and discuss their progress.
Post Reply
Oldsparkey
Design Reviewer
Posts: 1272
Joined: Sat Jun 19, 2004 11:08 am
Type of boat I like: Wood boats .
Location: Somewhere around Central Florida
Contact:

Post by Oldsparkey »

Sounds good but I will be in the Everglades in a couple of weeks for a week out on the water , could you deliver it over there so I don't have to use one of my boats ?

Then I could take it home and after a few years of trying it and seeing where it needs the varnish do the job for you. You do know the epoxy needs to totally dry/cure/set up before you varnish it. :lol:

Chuck
Remember:
Amateurs built the Ark...... Professionals built the Titanic
Visit some fine paddlers at The Southern Paddler
Mullet_Key
Posts: 97
Joined: Wed Sep 08, 2004 11:38 am
Type of boat I like: <-- Please read instructions to the left and delete this text. Then, tell us what type boat you like! :-)
Location: Houston, TX
Contact:

Post by Mullet_Key »

Looks real good DM. The blue masking tape vs sanding and scraping excess dried epoxy. Good idea!!. I think it would help on creating a little build-up where we get that panel-to-panel epoxy joint filler shrinkage. (Sorry if that sounds confusing, but you guys know what I mean). I had come back 2 or 3 times with a little filler to cover the voids.

Glassing the hull on Houston's WadeFish starts tonight. I'm using Matt's suggestion to glass 1/2 of the hull at a time with a little over-lap at the keel. See ya.
Pygmy Arctic Tern
JEM Swamp Girl -15
JEM Wadefish 15
surfman
Posts: 229
Joined: Tue Apr 25, 2006 3:00 pm
Type of boat I like: <-- Please read instructions to the left and delete this text. Then, tell us what type boat you like! :-)
Location: Lutz-Steinhatchee, FL
Contact:

Post by surfman »

Looking good. That is gong to be a nice boat.
dangermouse01
Posts: 200
Joined: Mon Jul 31, 2006 6:32 pm
Type of boat I like: <-- Please read instructions to the left and delete this text. Then, tell us what type boat you like! :-)
Location: Palm Bay, FL (east coast)

Post by dangermouse01 »

Hey MK;
Even with the blue tape, I still got a pretty good amount of epoxy joint filler shrinkage. (I know what you meant). But then I didn't pre-coat the edges of the panels with epoxy. After I took out the stitches, I just dabbed another line of fillet material in as I was filling in the stitch areas.

Then after the fillets are good and cured, I just slid a sharp wood chisel under the tape and then twisted it. The epoxy slather on the tape breaks right a the edge of the tape. Slide the chisel along the edge and twist, slide and twist all the way along the length of the boat
Then hit it with 80 grit on a sanding block.

DM
dangermouse01
Posts: 200
Joined: Mon Jul 31, 2006 6:32 pm
Type of boat I like: <-- Please read instructions to the left and delete this text. Then, tell us what type boat you like! :-)
Location: Palm Bay, FL (east coast)

Post by dangermouse01 »

Glassed the outside of the hull today.
No saturation coat, just cloth on wood.
Took about 4 hours of spreading epoxy.
Did the non-recommended one piece of cloth method.
If it is your first boat build, I would also recommend multi-piece method.
Image

DM
Mullet_Key
Posts: 97
Joined: Wed Sep 08, 2004 11:38 am
Type of boat I like: <-- Please read instructions to the left and delete this text. Then, tell us what type boat you like! :-)
Location: Houston, TX
Contact:

Glassing the hull

Post by Mullet_Key »

Very sharp!!
Pygmy Arctic Tern
JEM Swamp Girl -15
JEM Wadefish 15
dangermouse01
Posts: 200
Joined: Mon Jul 31, 2006 6:32 pm
Type of boat I like: <-- Please read instructions to the left and delete this text. Then, tell us what type boat you like! :-)
Location: Palm Bay, FL (east coast)

Post by dangermouse01 »

No new pictures.
But since my last post, I have gotten all the fill coats on the outside of the hull. Glassed the outside of the cockpit and tankwell. Filleted the inside of the hull. Glassed the inside of the hull yesterday, second coat of epoxy will go on today after I get home from work.

Everything is going together like a champ :D
I think I am finally over that hump of boat building, where I can work on it all day and it seems like I havent gotten much done. Things start going together now.

DM
dangermouse01
Posts: 200
Joined: Mon Jul 31, 2006 6:32 pm
Type of boat I like: <-- Please read instructions to the left and delete this text. Then, tell us what type boat you like! :-)
Location: Palm Bay, FL (east coast)

Post by dangermouse01 »

Ok, finally downloaded some pictures from the camera.
This series is about how the foot braces will be mounted.
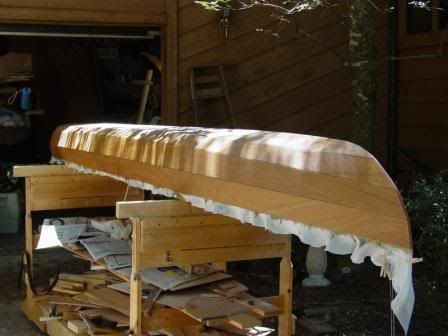
The cockpit has already been glassed on both the inside and outside, but will still get more sanding later.
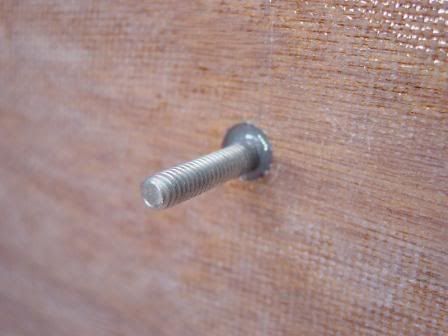
I had decided to go with stud mounted foot braces, where the stud gets epoxied onto the boat. After making sure that the threaded portion was long enough with my mounting plan to still be able to get a nut on it to mount the foot braces, I proceeded on.
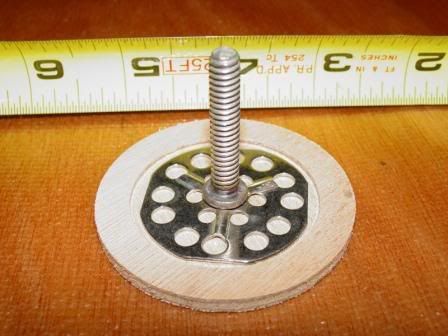
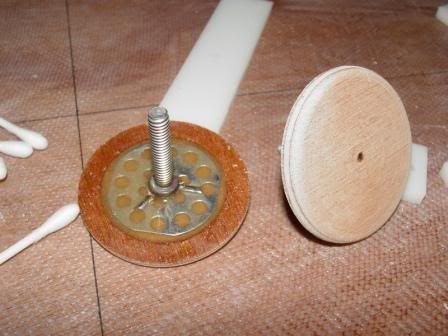
I made some round disks out of some scrap 4mm okume. Counter bored a hole on one side so that the top surface of the stud's flange is flush with the top surface of the disk. Placed the stud in and poured in some thickened epoxy. And let it cure.
ImageImage

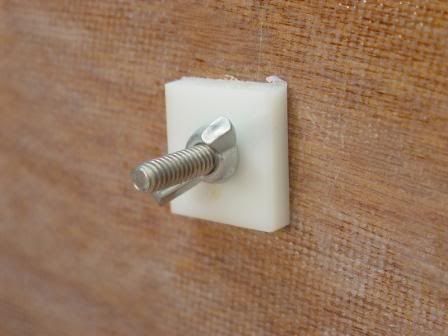
I drilled a 7/16's diameter hole thru the cockpit wall at the front stud location. The stud is a 1/4-20 thread, but it has a collar at the base that required the 7/16 diameter hole so that it would mount up flush. I mixed up some epoxy thickened with cabosil, applied this to the mounting surface of the stud and installed it from the outside of the cockpit. Placed a piece of delrin (plastic) with a 1/4 diameter hole drilled thru on the stud and snugged it with a wing nut until the epoxy cured. The delrin spacer keeps the epoxy flush with the inside surface of the cockpit, epoxy doesn't stick to it, and it keeps the stud perpendicular to the cockpit wall. The second picture here is what shows on the inside of the cockpit.
ImageImage

After the epoxy cured, I removed the wing nut and delrin, put the foot brace rail on the stud and used it to located the hole at the other end. Drilled another 7/16 diameter hole for the rear stud. I put a delrin spacer back on the front stud, mixed up some epoxy applied it to the rear stud, installed it thru the cockpit from the outside. Put on a delrin spacer and then mounted the foot brace rail on both studs (this insured that the rear stud would be in the right spot), and snugged both ends down with nuts.

After it cured, flipped the cockpit over and did the other side.
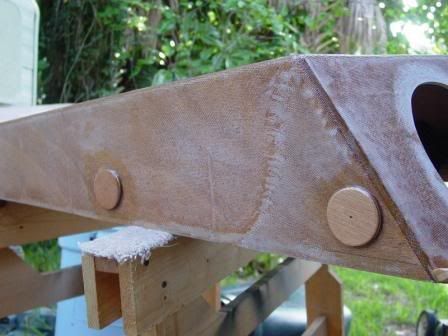
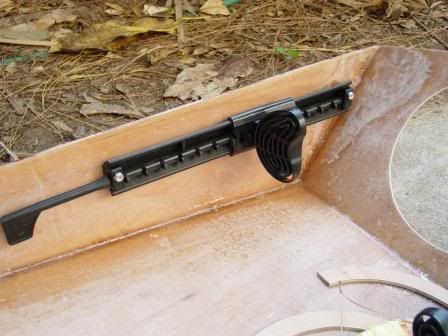
Heres a picture of how it looks from the outside of the cockpit, and one of how it will look when I finally get the foot braces installed.
ImageImage

DM
hairymick
Design Reviewer
Posts: 1965
Joined: Wed Jan 04, 2006 8:54 am
Type of boat I like: <-- Please read instructions to the left and delete this text. Then, tell us what type boat you like! :-)
Location: Queensland, Australia
Contact:

Post by hairymick »

Beautiful work mate, and very well thought out. I just love to watch a master at work.
Regards,
Mick

JEMWATERCRAFT Swampgirl; Wadefish;Touring Pirogue;South Wind; P5 ;
Laker X 2, Sasquatch 16.5 T-V 15 Okwata 15:
Cobia 15 (under construction)
jem
Site Admin
Posts: 4916
Joined: Fri Jun 18, 2004 8:14 pm
Type of boat I like: Wooden
Location: Greensboro, NC
Contact:

Post by jem »

very nice!
-Matt. Designer.
Post Reply