Hi Morten. I'm finding your 3D model really great to have. Here is a section of the motorwell which I've been studying:
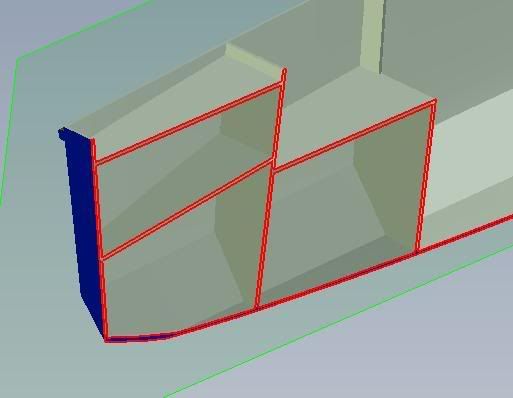
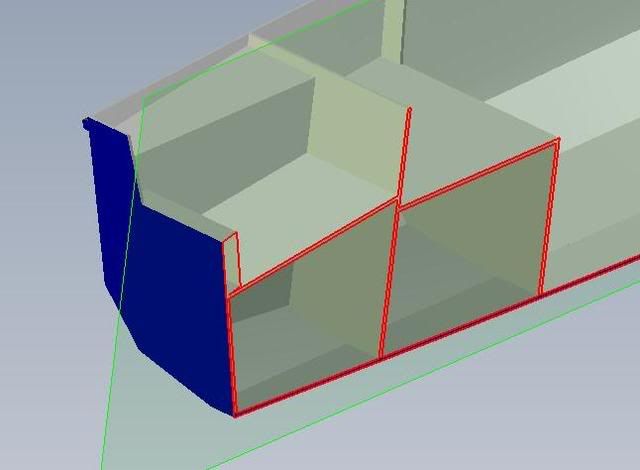
My question how should join the motorwell bottom and sides? I am thinking I should I cut slots in them, and assemble the back going from the side of the rear seat towards transom, filleting and taping as I go along ... hmmm .. but this would leave the motor well sides untaped to the transom.
How about I cut the motorwell bottom into 3 pieces and add glue battens to the motorwell sides? This way I can tape the motor well sides to the transom.
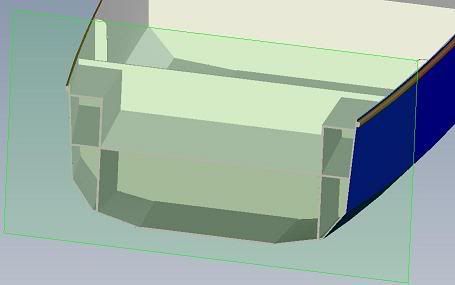
Shouldn't there be a scupper on the transom just above the motorwell bottom?
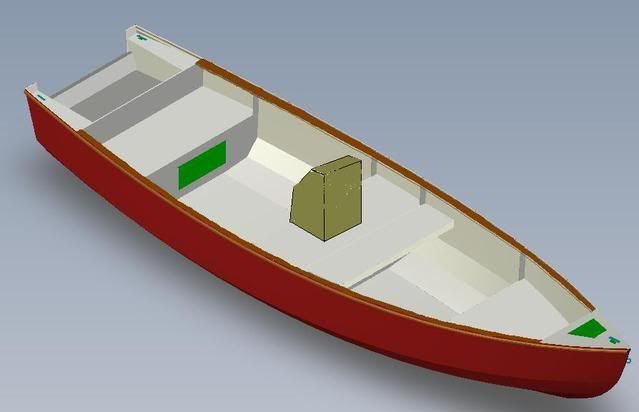
Added more instructive pictures:
DK18 Motorwell
-
- Posts: 130
- Joined: Wed Mar 15, 2006 9:06 pm
- Type of boat I like: <-- Please read instructions to the left and delete this text. Then, tell us what type boat you like! :-)
DK18 Motorwell
Louis
-
- Design Reviewer
- Posts: 143
- Joined: Tue Dec 21, 2004 7:55 am
- Type of boat I like: <-- Please read instructions to the left and delete this text. Then, tell us what type boat you like! :-)
- Location: Denmark
- Contact:
Hi Louis,
Sorry but there is an error in the model. Please download the latest version where the motor well area is modeled correct.
The section should look like the picture below.
You first assemble the engine well sides (1) and they can be glued and glassed to the hull, frame and transom. Then you assemble the engine well bottom (2). It would be fine to have some glue battens to make sure the engine well bottom stays in the right place. Finally you assemble the side deck pieces (3). It is enough to glue and glass the bottom and side pieces from outside only.
Scuppers just above the bottom would be fine to lead out the spray water from the outboard.
Morten Olesen - Boatplans.dk
Website: http://www.boatplans.dk/
Blog: http://BoatBuildingArticles.com/
Check out my author page at Amazon and browse for boat building books: http://www.boatplans.dk/news.asp?news=amazon
Website: http://www.boatplans.dk/
Blog: http://BoatBuildingArticles.com/
Check out my author page at Amazon and browse for boat building books: http://www.boatplans.dk/news.asp?news=amazon
-
- Design Reviewer
- Posts: 143
- Joined: Tue Dec 21, 2004 7:55 am
- Type of boat I like: <-- Please read instructions to the left and delete this text. Then, tell us what type boat you like! :-)
- Location: Denmark
- Contact:
No problem, I have sent you an email with the download link.
I think your idea about the rounded corners sounds fine. It will be a bit more difficult to make, but i am sure you are aware of that.
Morten Olesen - Boatplans.dk
Website: http://www.boatplans.dk/
Blog: http://BoatBuildingArticles.com/
Check out my author page at Amazon and browse for boat building books: http://www.boatplans.dk/news.asp?news=amazon
Website: http://www.boatplans.dk/
Blog: http://BoatBuildingArticles.com/
Check out my author page at Amazon and browse for boat building books: http://www.boatplans.dk/news.asp?news=amazon
-
- Posts: 130
- Joined: Wed Mar 15, 2006 9:06 pm
- Type of boat I like: <-- Please read instructions to the left and delete this text. Then, tell us what type boat you like! :-)
Thanks Morten. I got the new model. I have a few more thoughts that I hope you can give me your comments on. From experience I think it is better to think all the details through if only so I can put all the epoxy bushings before I assemble the panels.
For the corners I was thinking to lap joint good lumber at the corners which would be rounded with a router. I'd of course still put tape.
I'll be putting vertical hatches at the forward and rear decks. How big can they be. I ask because those panels may be structural. How about the side decks of the motorwell, how big can the hatches be? I want to put a batteries maybe some tools there.
I've not decided how to exactly do the center seat. I'll definitely be putting the gas tank inside it but I'm also thinking of putting a center console and making the seat longer. Something like this:
Louis
-
- Design Reviewer
- Posts: 143
- Joined: Tue Dec 21, 2004 7:55 am
- Type of boat I like: <-- Please read instructions to the left and delete this text. Then, tell us what type boat you like! :-)
- Location: Denmark
- Contact:
That a good idea to plan your work in details before starting to build.
Your plan for the corners sounds fine to me. It will also together with the fiber glass tape give a good strong assembly.
When planing the size of the hatches you should make sure there is at least 50 mm (2") plywood left all the way around the hatch. This means that if you take frame E the cutout for the hatch should be no more than 252 mm (9-7/8") high.
The center console looks fine to me. Also making the seat longer will not be a problem. Just remember to have some support at the forward edge of the extended seat.
Morten Olesen - Boatplans.dk
Website: http://www.boatplans.dk/
Blog: http://BoatBuildingArticles.com/
Check out my author page at Amazon and browse for boat building books: http://www.boatplans.dk/news.asp?news=amazon
Website: http://www.boatplans.dk/
Blog: http://BoatBuildingArticles.com/
Check out my author page at Amazon and browse for boat building books: http://www.boatplans.dk/news.asp?news=amazon