Page 1 of 2
Dan's 12 foot row boat
Posted: Sun Jun 01, 2008 5:46 am
by davaodan
I am Dan from the Philippines, retired here from the US and I am getting serious about my free time. Last week I finished a Puddle Duck Racer that I am very pleased with, but now on to new horizons.
I have chosen Morten's 12 foot row boat because I have had several small boats in my life but always power boats and I want to experience the pleasure of rowing a boat designed for rowing. I can also use it for fishing in the Davao Gulf. Two days ago I started lofting the pieces from four sheets of 9mm plywood.
I was fortunate enough to buy all of Morten's plans for his one price. What a deal! Now I have to try to build them all? Well, the wife says "Where's mine?"
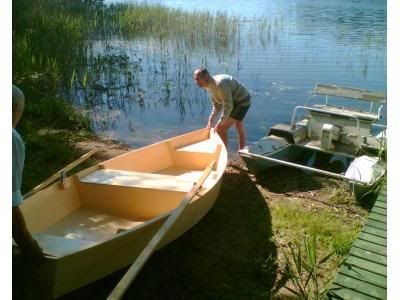
I have a lot of fun work to do and it should look something like this when finished.
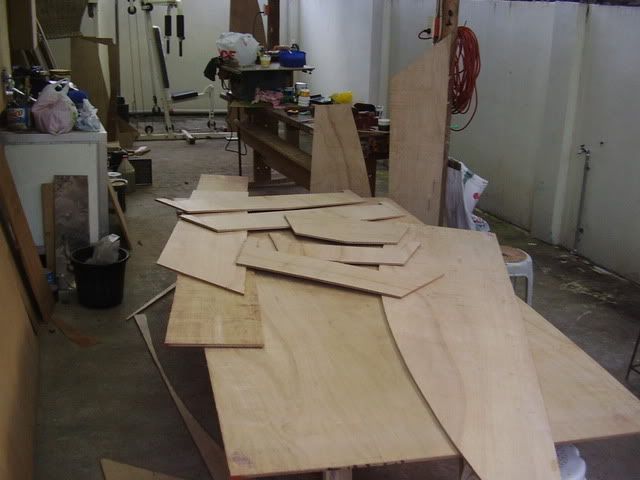
Here is the before picture with one more sheet of plywood to cut up.
Here is the boat I just finished.
I will keep you posted. Now let's see, part A is to part B as BA is to AB....
Dan in Davao
Posted: Sun Jun 01, 2008 7:07 am
by jem
Posted: Sun Jun 01, 2008 9:27 am
by hairymick
G'day Dan,
And welcome aboard mate.

Those PD racers seem to be getting, allmost a cult following out here.


Great fun apparently. There a a few hitting that waters round here with ,many more to come from all the reports I have heard.
That 12 foot rower looks a fine boat mate, enjoy.
Posted: Sun Jun 01, 2008 4:16 pm
by Kayak Jack
Nice, simple little boat. Lots of fun wrapped up in that, I'll bet.
Posted: Fri Jun 13, 2008 8:22 am
by Flump
Hey Dan, good luck building the rowing boat. PDR looks pretty good
what hull number did you get? I've got #144 - I'm Quacker's.....that reminds me, I've still not launched it yet and it's been finished for nine months

Cheers........Nick
Posted: Fri Jun 13, 2008 8:29 am
by hairymick
G'day Nick,
I've got #144 - I'm Quacker's.....that reminds me, I've still not launched it yet and it's been finished for nine months
Get out the back mate, You know the drill, Give yourself 3 sharp uppercuts.

Posted: Sat Jun 21, 2008 5:31 am
by davaodan
I was finally able to get back to the boat. While building the strongback for the frames I dropped a piece of wood on my foot. OUCH! I had a big black toe.
This thing goes together very quickly, so I quickly that I forgot to get pictures of the strongback alone.
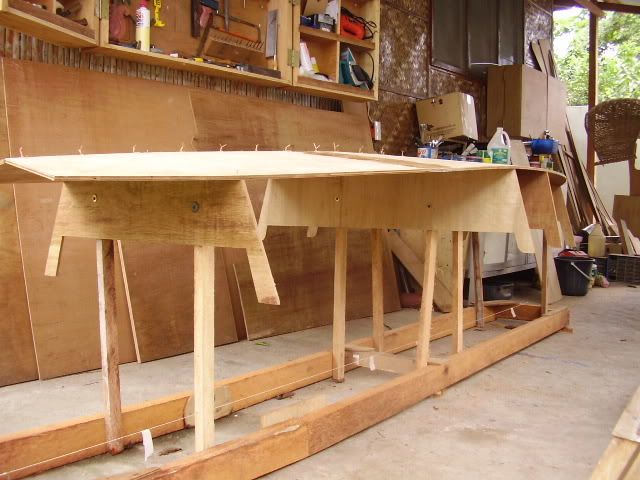
I took a low shot to show some of the structure involved in the frame support.
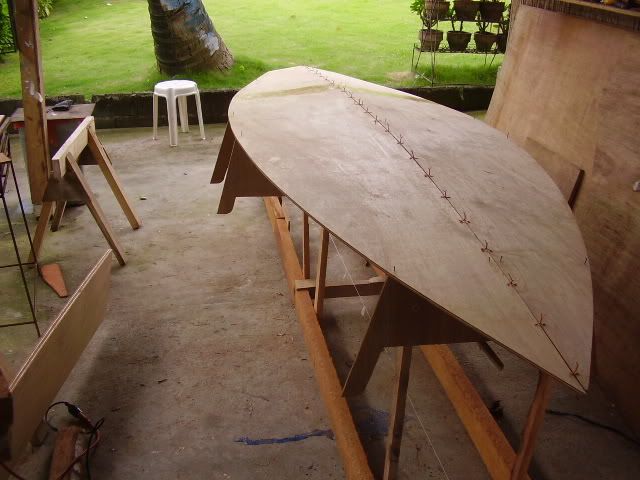
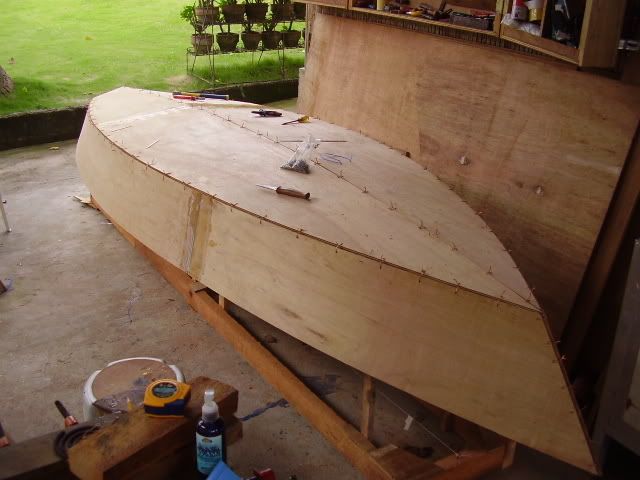
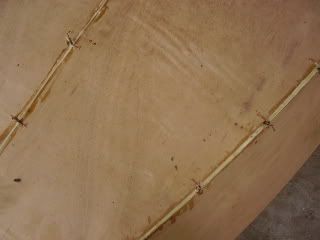
The bottom and sides have been stitched with copper wire and everything is fitting together very nicely.
Here the sides are stitched on. I do like the idea of building a strongback for the frames, everything is precise and can be adjusted to perfection.
Monday I'll be going sailing again so I'll be away from this project for awhile. Retirement is so busy.
Dan in Davao
Posted: Sat Jun 28, 2008 4:42 am
by davaodan
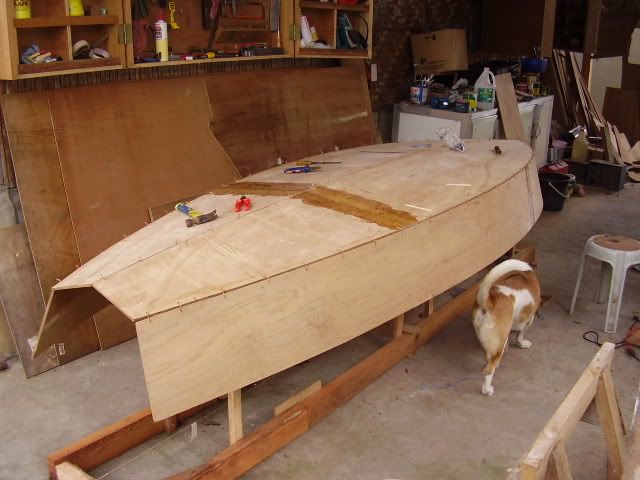
Today I was able to take a couple of hours and get the thickened epoxy mix put in the seams. Tomorrow I'll take the wires out and finish the job. Sanding and preparing contours for the glass tape will follow.
Dan in Davao
Posted: Mon Jul 07, 2008 5:13 pm
by davaodan
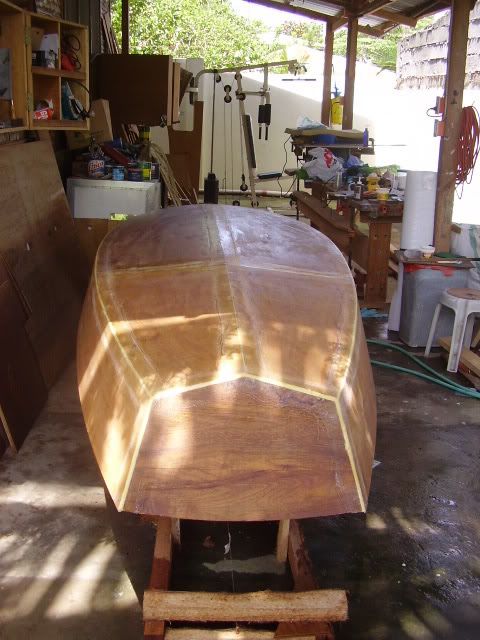
All the stitches are pulled and the outside of the hull is now ready for fiberglass tape. Notice the nice white color of the epoxy filling the seams? That is wheat flour. There is no ready supply for wood dust or silica here in the Philippines so I decided to go with some unidentified flour I had. It seems to work well, not too hard to sand. I covered all of the epoxy with a plastic film to take out the roughness of the surface. Works great and peels off easily.
I do have some micromix (spheres) but I think that thickening agent is too brittle for this purpose. This epoxy seam must hold the edges that were previously wire stitched together without breaking. I do plan on using the micromix for the interior fillets after the outside has been secured with epoxied fiberglass tape. This hull will not be finished clear, so I am not concerned about the color difference with the wood. I have far too many things to cover up for that.
Dan in Davao
Posted: Tue Jul 15, 2008 11:23 pm
by davaodan
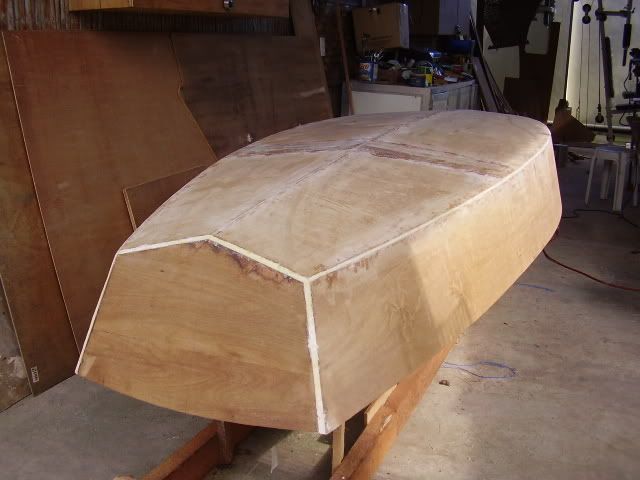
In these pictures I have sanded the first application of epoxy and the fiberglass tape. Then I washed the outside with soap and water. It looks smooth enough for my second and final exterior coat of epoxy. This boat will be stored out of the water so it should last many years with periodic paint jobs. After the second epoxy coat I will be removing the strongback and working in the inside. I like the lines of Mortens design.
Does anyone know how to calculate oarlock placement? There are no specs for that in the plans. I have since Googled oarlock placement and found I should put the oarlocks about 12 inches abaft the thwart. Shiver me timbers! Nautical speak for 12 inches toward the stern from the seat.
Dan in Davao